Following a near glorious victory, only being denied by the clock, the Huns moved on to the second game of the competition. This would see them face off against that wargames favourite, the Seleukids played by Simon Cooper.
To see what happened, read on ...
To remind you of my Hunnic list:
For the second time the Huns found themselves invading despite wanting to defend in the Plains. However, again the PBS sequence was favourable and the only terrain on table were a couple of Woods on the Hunnic right flank. Whilst this gave the Seleukids a fairly secure flank, it also meant that I had a good idea of where their army would be - and as it isn't very wide I'd have plenty of space for my horse archers.Scouting was disappointing as despite a significant card advantage I only managed 20%. The Seleukid deployment was as expected up against the woods. They deployed catafracts next to the woods, clearly aiming to wheel them round to pressure me, with their infantry extending from there and angled back to avoid me running round the flank.
unsurprisingly I deployed weighted to the other side of the battlefield with most of my good troops towards the left, although the leftmost unit were the horse archers in Roman armour rather than a Skilled Shooter unit as the Seleukid rightmost unit was a Poor quality one and I didn't need the skilled shooters to take them down.
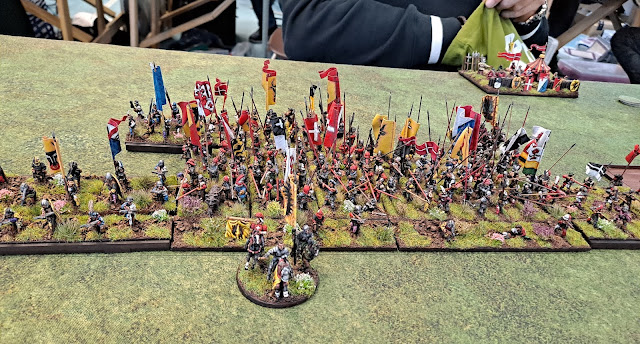
After deployment it looked like this:
As with the first game there were no real surprises in the first move. The Seleukids pushed forward as strongly as they could to try and cut down my manoeuvre room, whilst I pushed a small unit forward on my right to delay the catafracts whilst pushing my horse archers up to be able to concentrate their shooting as much as possible. The aim is to blow units away in sequence rather than spreading damage along the line. Focus 😁
Knowing the shooting is coming the Seleukids have deployed some skirmishers in front of their infantry to try and take some of the pain.
The pain was real, but that is what the skirmishers were there for after all.
However, because of the shooting the Seleukid advance was slowed; they also had poor cards which did not help. My Huns did a bit of shuffling to ensure the best shooting opportunities, but otherwise it was a quiet move.
The nxt move was a bit of the same, although the Seleukids did push a bit harder on my right and a couple fo my units did have to give ground - but this was expected.
Shooting was mixed. One pike unit suffered badly with 2 bases shot off, but elsewhere other units were just slowed - but as that means more shots for me it is acceptable.
Most importantly, I pushed the skirmishers screening the Poor quality unit back behind them, exposing them to upgraded shooting in the next turn.
That shooting proved to be exceptional. With a single volley the Poor quality spearmen were broken. Utterly outrageous and not something Simon could have been expected to plan for. the odds were many 100s to 1 for that to happen.
Elsewhere there was a bit of chipping away and slowing, but the Seleukid right wing was in real trouble.
My own right was also starting to come under a bit of pressure as the Seleukids wheeled inwards, but overall it looked quite good for me at this point. Because of the destroyed unit I was able to massively gang up on the next uit in line which I had already damaged.
Because of the numbers I had got shooting at it, the now exposed unit on the Seleukid right was shot down the following move whilst the pike unit next to it took further damage and was looking vulnerable. This caused Simon to move the Superior Agema catafracts over to try and shore up his right.
On my right I had to fall back some more and was doing little damage, however, with everything going well on my left this was fine, and the troops most likely to get to my camp quickly were the catafracts who could not actually attack it as it was Fortified - the reason I took it as that really.
After all the fireworks of the last few moves the next was relatively staid an no further casualties were inflicted. I regrouped a bit in the centre to tee up some more shooting. On my right one small unit was effectively trapped against the camp; it's the way it goes.
I was now picking on the Agema and a unit of Thracians in the centre of the Seleukid line as well as the badly damaged pike unit. All took casualties with 2 of them just 1 Wound from breaking - the AGema being the most healthy.
The following move was the last. I shot down the Thracians and the Agema (a bit lucky with that one really) but the pikemen survived that shooting, but then broke when testing for seeing the Agema break.That took down the Seleukid army.
Rather cruelly in my view this meant that the game was scored 15-0 to me as I had managed to not lose a single unit. I don't think Simon did anything wrong and deserved some points, but the speed I took down his right (with a good chunk of luck) meant he missed out.
So after day 1 I was on 26 points which left me in a good position, just a bit off the pace of the leaders.
Game 3 is at - https://gamer-at-the-end-of-time.blogspot.com/2023/11/the-huns-are-back-in-town-derventio_9.html


Decisive victory for your army. Very enjoyable battle report.
ReplyDelete