Roll Call - Lusignan Cypriots part 1
.jpg)
12th and 13th of April 2025 saw the annual Roll Call competition run by the BHGS. A small MeG field of 6 players, but much fun was had in the games.
I took Lusignan Cypriot and to see how things went, read on ...
The theme for Roll Call was Ottoman (ish) based on the Ottoman Turkish list, the enemies listed for them and a few others added to give players a good choice. Armies had to be dated between 1362 and 1520 CE. All the lists can be seen HERE.
I chose to use Lusignan Cypriot with a Mamluk Egyptian ally and came up with the following list:

In many ways this is just a crusader army with a horse archer ally as is often popular in crusader theme competitions, however, the Mamluks allow you to field Skilled shooters which is a nice addition. The Mediocre general allows for an extra card although it does mean that you don't have much control over the terrain and are likely to be outscouted. On the other hand, it isn't an army that will be looking to use a "clever" deployment so it probably isn't much of an issue really - I certainly didn't find it a problem during the competition.
In the first round I played Pete Entwistle who was using a Later Medieval German army. Not unexpectedly I lost the initial die roll and was outscouted, but as already noted this was no really an issue. The Germans defended and went for a reasonable amount of terrain - I think because they are not a wide army and with the Mamluks I was more manoeuvrable in the open. Most of the terrain ended up on Pete's base line with rough and difficult going on his right and a gentle hill on his left. I ended up with a vineyard in the centre of my base line. We both ended up deploying in the right hand side of the table as I looked at it - whilst my left was more open it was better to deploy opposite where the Germans were likely to be in order to maximise the chances of a result.
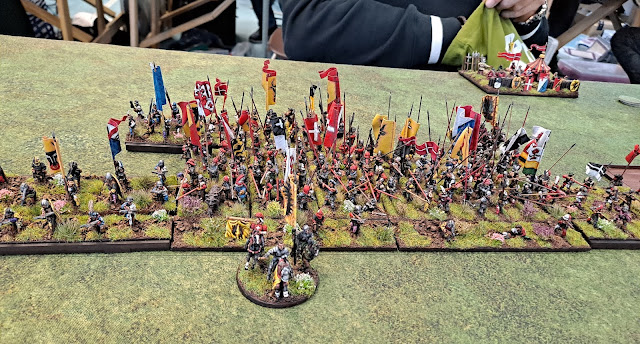
I deployed all my cavalry bar the small mamalik unit on the right where there was open terrain, my loose infantry and the Catalans in the vineyard and the spearmen on my left in front of my camp. The Germans were opposite me with a centre of pikemen including a Swiss ally, flanked by crossbowmen and their cavalry on their left. It looked like this:

The Germans are tough and I haven't got anything that can fight the pikemen frontally so I was planning to try and beat the German cavalry on my right whilst using the Mamluks to shoot up pikemen with their Skilled shooting and then turn on the flank of the rest of the army.
The Germans advanced steadily but could not go too quickly as their knights are Tribal (clumsy formations) which let me get a reasonable way across the table which I wanted so as to allow the Mamluks room to skirmish whilst shooting pikemen. The German advance also wheeled towards my right so as to bring infantry in front of some of my knights. I pushed one spear unit forward on my left to try and distract some of the German infantry on that flank.

As there was a German crossbow unit in the front line I decided to charge it along with the halberdiers that were next to them whilst also charging the most advanced German knight unit as the knights doing this could also hit the crossbowmen. It was a bit of a risk going for the crossbowmen and halberdiers with the same unit, however, it paid off nicely and the crossbowmen were wiped out quickly and the halberdiers badly damaged in the same turn - it must be said that Pete's dice were terrible and mine were exactly the opposite here as he did no damage to me at all.

Pete now threw his second knight unit into the fray to stabilise his left flank and chose to hit both my knight units so as to outnumber both in combat - a reasonable decision.

This partially worked as one of my knight units fell apart in short order, however, the other was fighting hard and giving out far more than it was taking reducing both the units it was fighting to teetering on the edge of breaking.
Elsewhere, despite a couple of good shots the Mamluks shooting wasn't doing what I hoped and the Germans were advancing along the line. On my left I did get my spearmen into some crossbowmen, but that bogged down and Pete brought up some Swiss to intervene.

The Swiss piled into the spearmen and despite the small Mamluk unit charging them in the flank they went on to destroy both the spearmen and Mamluks.
On the right my knights broke one of the badly damaged German knight units but the other was still fighting. One of the Mamluk royal cavalry was charged by the rather damaged halberdiers and quickly broke them - thankfully due to being able to control their pursuit they avoided then crashing into one of the pike units which would have been painful, especially as the halberdiers had removed 2 bases before breaking.

We ran out of game time shortly after, but not before my knights had broken the second German knight unit.
The score was 10-8 to me. It must be said that Pete's dice were pretty poor all game whilst mine were above average.
This then pitched me up against Will Denham and his Aq Qoyunlu (aka White Sheep Turkoman) - hence his t-shirt ...

As Will had a Legendary general to my Mediocre one he won the initial die roll and also rather convincingly outscouted me. No great surprise here 😁 Will chose to invade so as to get the benefit of his No Camp choice. We ended up with a secure flank on my left with a wood and some rough going, but otherwise an open field - the secure flank was pretty vital for me given the matchup, and no other terrain wasn't really an issue although some more terrain would have been nice.
I deployed to my left with the Catalans in the wood, most of my cavalry next to the wood and the infantry on the right with a knight unit; my right was angled back towards the base edge to stop the horse archers running around the flank. Will deployed his troops on his left, but also sent 3 units (a third of his army) on a flank march on my left to get behind me.
I decided that I could leave some troops on my left to contain the flank march should it arrive and still have enough to attack the rest of Will's army as quickly as possible - with a general off table I would have more cards to play with than Will. It looked like this:

At this point, and to put the game in context, I have to note that throughout the game Will's cards were absolutely dreadful and he was very limited in what he could actually do. Given that the Turkoman are an army that relies on movement, and that Will was waiting for his flank march to appear, this was crippling. His flank march did draw a Red in turn 2, however, as he had Loose troops in it and not just Skirmishers/Flexibles he needed to accumulate 2 Red cards and this never happened ...
Because of his crippling cards after his first advance moves I was more or less able to freely advance what I wanted where I wanted it, especially my cavalry from my left. After the first 2 moves I had a unit of knights and a unit of the Royal mamluks round his right flank with the knights teed up to flank charge Will's one unit of good combat cavalry, Kurdish lancers.
This was what it looked like:

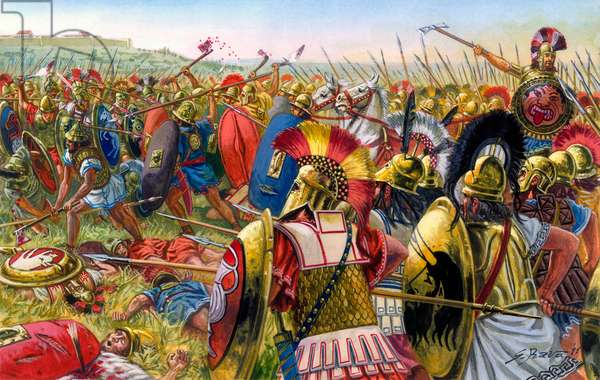
What happened in the knights charge can be best illustrated by this picture ...

Insult to injury I then rolled another Skull to kill the general who was with the Kurds.
The following move, after another round of rubbish cards for Will I had charged 2 more of his units and reduced them to almost broken, and I had a Mamluk unit ready to flank charge one of them as well.

That went in and the game was all over shortly afterwards.

A very brutal 15-0 to me.
Will and I did discuss whether the Flank March mechanism really works and pretty much agreed that unless you are only sending Flexible cavalry and/or Skirmishers on a flank march they are best avoided. Something to look at when a rules revision is undertaken I think.
So at the end of the day I was on 25 points. How I fared on day 2 will follow when I have time to write it up.


Comments
Post a Comment